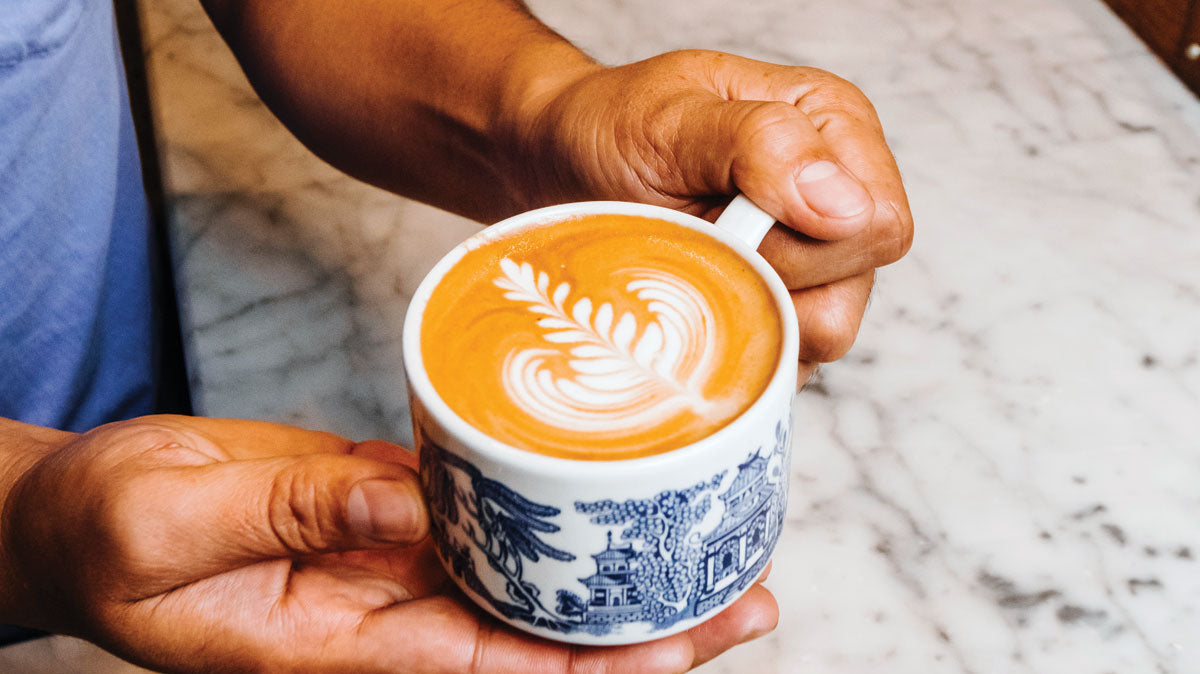


One of the best parts of ordering an espresso drink at a cafe is seeing the beautiful latte art right on top. If you’ve recently started a home barista journey, chances are you’re excited to dive into making latte art yourself. In this guide, we’ll break down latte art step-by-step and share some pro tips so you can start making lattes just like a barista.
What is Latte Art?
Latte art is the design made on top of milk-based espresso drinks created by a technique used by baristas. Using a specific pouring technique, baristas make hearts, rosettas, and more out of steamed milk and espresso. Though latte art doesn’t affect the taste of your beverage, it does add an aesthetic experience intended to elevate the enjoyment of the beverage while demonstrating mastery of milk frothing, which does influence the quality of a latte.
Some baristas also utilize latte art stencils when creating latte art. While you can certainly make unique designs with stencils, it’s not quite the same as creating latte art with foam.
What Type of Milk is Best for Latte Art?
Though you can steam any type of dairy or non-dairy milk to create a latte, whole dairy milk is widely preferred when creating latte art. Since whole milk has a high-fat content, it can easily create that silky microfoam perfect for making latte art. Oat milk is a fantastic non-dairy alternative as you can also achieve microfoam when steaming.
Learn more: 8 Best Non-Dairy Milks for Coffee | 5 Best Oatmilks for Coffee
What Equipment do You Need for Latte Art?
To create latte art, you need to pull a shot of espresso and steam your milk.
You will need:
- A coffee cup
- A milk steaming pitcher
- A steam wand or milk-frothing device
Does Cup Size and Shape Impact Latte Art?
Your coffee cup size and shape influence how much milk you’ll need to steam for your latte. Cups that are bowl-shaped or as wide as they are tall will make pouring latte art far easier. A 12-ounce steaming pitcher is perfect for 8-ounce drinks or smaller, such as macchiatos or cortados. A 20-ounce steaming pitcher is best for drinks larger than 8 ounces. Our recommendation is to pour the milk about a finger’s width under the spout of the pitcher.
The key is to steam just enough milk to fill the cup and make your art. If you don’t steam enough milk, you might not have enough foam to even make your art. If you steam too much milk, the cup will fill up before you have a chance to create anything and it creates unnecessary waste.
How to Pour Latte Art
Ready to learn the basics? These are the essential steps to pouring great latte art.
1. Steam Your Milk
The key to great latte art is perfectly steamed milk. Good steamed milk should be rich with microfoam and mixed evenly–there shouldn’t be separate layers of thick foam and hot milk. Pour the milk about a finger’s width under the spout of the pitcher and submerge the steam wand under the surface of the milk. Turn the steam wand on to introduce air into the milk and begin the steaming process. After a few seconds, further submerge the steam wand so the hot milk and foam can fully combine. The desired texture should remind you of latex paint.
Learn more: How to Steam Milk for a Latte
2. Begin Pouring
How you start pouring your steamed milk into your espresso influences the success of your latte art. Tilt the cup with espresso at a 45-degree angle and hold the steaming pitcher high, about 5-6 inches above the cup. Pour the steamed milk into the deepest part of the espresso so that the milk goes under the crema and blends with the espresso. At this step, you are pouring the steamed milk high & slow.
Note: Crema is the caramel-colored foam on top of an espresso shot and is one of the best canvases for latte art. Pouring milk under the crema helps preserve that beautiful color and flavor.
3. Draw the Latte Art
Once your cup is nearly full, draw the pitcher closer to the latte’s surface and bring the cup back to an even angle. Now you’ll begin to pour the milk low & fast. You should see white milk foam gathering on the surface of the latte. Wiggle the pitcher back and forth to spread the milk over a larger area and draw your design.
Types of Latte Art & How to Make Them
With the basics mastered, you should be ready to try some of the most popular latte art designs.
Heart
The heart is one of the simplest and most popular forms of latte art. Follow the steps above to set up your latte. Once your cup is nearly full, draw your pitcher closer to the surface of the latte and begin to wiggle it back and forth so the foam spreads across the surface. Once it’s nearly covered, create a thinner stream of milk by pulling the pitcher up and through the design. Now, you have a heart!
Rosetta
When you’ve mastered the heart latte art, you’re ready to tackle a rosetta. Making a rosetta on your latte is very similar to making a heart. While shaking the pitcher to cover the surface with foam, you’re going to pull the pitcher back to the edge of the cup. Then, raise the pitcher and pull the milk through the design.
Tulip
When making a tulip, you’ll actually be pulling up your pitcher to stop the flow of milk. Start as you would when making a heart, but instead of pulling milk through the design, stop pouring. You should have a white circle in the middle of your latte. Start pouring again and you should see the first circle thin out and wrap around the new foam circle. Repeat until the stem is to your liking, then pull a line of milk through the entire design to reveal your tulip.
Swan
Making swan latte art might seem intimidating, but if you can master the other latte art techniques, making a swan should be simple. First, make a rosetta out of your steamed milk. Then, without wiggling the pitcher, draw a line of foam into the rosetta and back up again–this is the swan’s neck. Finally, make a small heart for the swan’s head.
We hope this guide has inspired you to start experimenting with latte art for your home brews. Be sure to give these techniques a shot and let us know how it ends up by tagging us on Instagram!
You might also like: